Category: Uncategorized

UV Air Cleaner: Everything You Need to Know

everything you need to know about a UV air cleaner

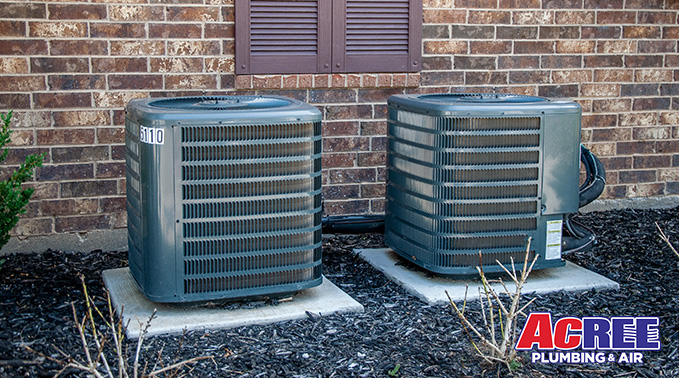
Healthy indoor air quality can help prevent allergies and asthma symptoms from acting up and other reactions to pollutants and toxins. Therefore, many homeowners opt for air purifiers or air cleaners—these appliances can lessen exposure to indoor allergens. There are various types of air cleaners, one of them being the UV Air Cleaner or ultraviolet air cleaner. These purifiers are a little controversial because of the risks that come with exposure to UV light. However, it’s been proven that UV light can kill bacteria and germs and is often used in hospitals do so. If you’re on the hunt for a new air cleaner and the UV type has caught your eye, here is a helpful guide on everything you need to know about a UV air cleaner—this way, you can make an informed decision.

How Does UV Air Cleaning Work?

UV Air Cleaners essentially inactivate airborne germs, bacteria and mold spores. They are sold as separate devices themselves or they come pre-installed in heating and cooling systems. Air is forced through the air cleaner under the light emitted from the UV lamp—any microorganisms in the indoor air have their DNA altered, which inactivates or destroys the microorganism.

Is UV Air Cleaning Safe?

It is reasonable to worry about the safety of ultraviolet air cleaners. The thing about UV air cleaners is that they can produce ozone—while Ozone can react with pollutants and break them down, it is also harmful and high exposure to ozone can lead to major health issues. To ensure you don’t have high ozone levels in your home, make sure you get a UV air cleaner with a good UV filter. In addition, make sure the UV light is emitted at a safe wavelength—for ozone to be produced, the UV light wavelength would have to be in the 160-240nm range.

Is UV Air Cleaning Effective?

There are uncertainties surrounding the technology behind UV air cleaners and how effective they are. The main issue with UV technology is the emission of ozone and the fact that works best with other filtration technology. A lot of these air cleaners are paired with HEPA or carbon filters, because simply UV technology is often not enough.

However, UV air cleaners are quiet and those brands that have been proven to work can be effective. Whatever air cleaner you purchase, make sure it is of higher quality and make sure you look at multiple sources before making a decision.

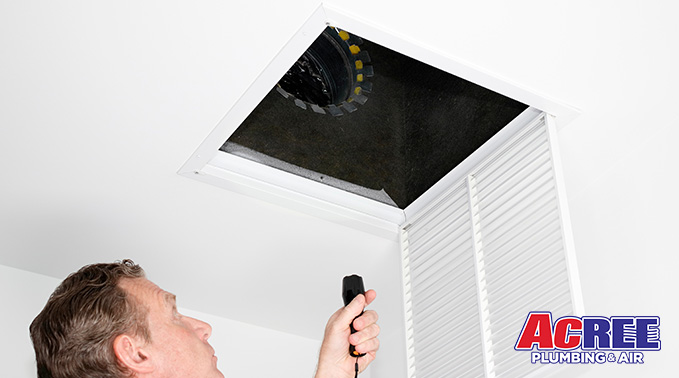
Have any more questions about UV Air Cleaners? Get in touch with the professionals at Acree! Our team of experts would be more than happy to answer your questions and address your concerns. Whether you need your indoor air quality improved, your ducts cleaned, your plumbing fixtures serviced, or your HVAC unit repaired, Acree will be here to help! Call us today at (813) 703-1273 or schedule a service with us on our website!

How Do You Know if You Have a Freon Leak?

how do you know if you have a freon leak

Refrigerant, also known as Freon, is a cooling agent present in your air conditioning system. It is a vital component of your unit and assists in removing heat from your indoor air. If you have less refrigerant, your AC will have trouble properly cooling your home. However, it’s not always easy to tell whether you have a Freon leak or not—you have to keep an eye out for certain signs. To help you out, the pros at Acree are here to share some common indications a Freon leak.

1. No Cool Air Coming from Vents

If you notice that warm air is coming from the vents or your AC just isn’t cooling the way it should, there might be a Freon leak. Before you make that assumption though, make sure you replace your AC filter and ensure your thermostat is on “cool” and the “auto” setting. If there is no change, you might have a Freon leak. Look for other signs of the leak or contact an HVAC technician to inspect your unit.

2. Hissing Sounds from Indoor and Outdoor Unit

Your AC system is a closed system, meaning refrigerant is supposed to stay in the system—so if the refrigerant levels are low, there is most likely a leak somewhere in the system. If you notice that your AC is unable to cool and you’ve switched your thermostat setting and changed your filter, head to your indoor unit and check for a hissing sound. Check your outdoor unit for hissing sounds as well. This specific noise indicates a crack or gap somewhere in the system. A larger leak might also have a gurgling sound.

3. AC Taking Longer to Cool

With less refrigerant than usual, your air conditioner might be taking longer to cool. This places a great burden on your air conditioner and forces it to run constantly. This can also be caused by air leaks, so make sure your home is properly sealed.

4. High Energy Bills

Check your electricity bills and see if you notice a significant spike in them. If you have higher electricity bills than usual, you might be dealing with a system that is using more energy. This could be caused by various things, but low Freon levels is one of them. An AC that runs constantly to get to the set temperature could be behind these high bills.

What to Do in The Event of a Freon Leak

If you strongly suspect you have a Freon leak, contact your local HVAC technician immediately. Freon is a dangerous substance and must be handled by licensed professionals only. They will inspect your system, troubleshoot the leak and refill refrigerant in no time.

Have More Questions About Freon Leaks? Contact the Pros at Acree! Our team of professionals will be happy to assist you and answer any questions you have. Call us today at (813) 703-1273 or schedule a service with us online!


How Often Should You Clean Your Drains?


how often should you clean drainsClean drains create a more efficient plumbing system free of any clogs and sewage backups. However, there is no clear answer on how often you should clean your drains, because it truly depends on your system, your schedule and how often you deal with plumbing issues in the first place. According to Acree, it’s best to clear them out on a monthly basis to prevent any major plumbing issues.

How to Do A Monthly Drain-Cleaning

If you are doing a monthly drain cleaning, you don’t need the help of a plumber. There are plenty DIY solutions that you can try out. Here is a step-by-step guide to cleaning out your drains.

  1. Inspect Your Drains

Every month look in your kitchen and bathrooms to ensure there are no slow drains. You’ll simply need a flashlight to carry out a full inspection.

  1. Unclog Any Drains

If you find that your bathtub or bathroom sinks are draining slowly, it is most likely because of all kinds of gunk, primarily consisting of soap and hair. If the drain is close enough, use a gloved hand to reach inside and pull it out. If you need to go a little deeper, you can fashion a thin hook using the wiring from a coat hanger. This little hook can effectively fish out any clogs that are a little deeper. You can also use a handy-dandy plunger—this tool can especially be helpful with kitchen sinks. When it comes to kitchen sinks, if you find your garbage disposal is clogged or stuck, you can try taking a more manual approach; use a 1/4th Allen key in the underside of disposal and crank in both directions.

  1. Monthly Cleaning Solution

You can skip the second step if you don’t notice any clogs or slow drains. Simply make a mixture using 1 cup of vinegar, 1 cup of hot water and half a cup of baking soda. Pour the mixture down the drain and cover the sink using a drain plug and let it sit for 10 minutes. Use 1 cup of boiling water to clear the mixture out. You can also try this mixture out when you have clogs.

Professional Cleaning

If you have a plumbing emergency such as a sewage backup or a stubborn clog that simply won’t go away, you might want to call the professionals in.  Sometimes clogs are unavoidable, even after regular cleaning and maintenance and that’s completely fine. Just stay calm and call a plumber near you. They will be able to help you and clear the clog out as quickly as possible.

Need Your Drains Clogged or Cleaned? Get in touch with The Pros at Acree!

If you are in Tampa, FL or any areas close by and are looking for drain cleaning and unclogging services, contact the pros at Acree! Our team of highly skilled experts will be more than happy to help you! Call us today (813) 703-1273 or schedule a service online!


How Much Does HVAC System Installation Cost?

how much does hvac installation cost

The time has finally arrived; your HVAC unit has started needing more repairs and it isn’t performing well. You have started looking into new HVAC systems and contractors, but you have many questions, namely how much does HVAC installation cost? The pros at Acree are here with an answer to that question!

HVAC Cost Guide

The average cost to replace an HVAC unit is within the range of $4,820 to $9,350. This specific replacement includes a new gas furnace and a central air conditioning system. If you want an HVAC system with ductwork, the cost will be between the $6,820 and $12,350 range. If you want to install it with any additional add-ons, the cost will be between $13,000 and $17,000.

If you want certain components like ductwork only, the cost can go up to $3,000 and if you want upgrades alone like an air cleaner or humidifier, the price range is between $2,000 and $4,000.

To install a furnace and central AC, it takes about 1 day. For the installation of ductwork, it can take between 3-5 days and for installation with add-ons the process can take up to 7 days.

Cost Factors

If you are preparing yourself for HVAC system installation costs, there are some things that will be factored into the cost.

  • Length of ductwork and whether it is needed or not
  • The age of your home, the quality of its construction as well as your HVAC components
  • Type of HVAC unit you want and how it provides heating or cooling. Does it use a gas or electric furnace? Are you opting for a heat pump instead? Is it a standard central AC system?
  • How difficult the installation process will be for your technician. Often, they will have to maneuver their way in crawl spaces to install certain components
  • The unit brand
  • Size of AC and furnace
  • It is also important to factor in other supplies like refrigerant, thermostat etc.

How to Know It’s Time to Install a New Unit

If you’re not sure whether it’s time to change things up or not, here are some signs:

  1. Age

The Department of Energy states that it is best to replace your unit after it is 10 or 15 years old. It’s better to replace it rather than spend time and money on expensive and constant repairs.

  1. Repair Costs More Than Half the AC Cost

As we mentioned before, if you find your repair bills spiking and amounting to half or more than half of the AC installation costs, it’s best to replace your unit.

  1. High Energy Bills

If you have done your best to curb your energy bills and they still keep increasing, it’s time to consult with an HVAC contractor you trust and see if replacement is a good option.

Want to know more about HVAC installation? The pros at Acree are here to help! Call us today at (813) 703-1273 or schedule a service on our website!

HVAC Maintenance Checklist: Handy Checklist for Preventative Maintenance

hvac maintenance checklist

With the summer season here, it’s important to ensure your HVAC system is ready to efficiently provide the cooling that you need. To do this, you will need to create an HVAC maintenance checklist, to make sure you get through all the maintenance tasks necessary. Preventative maintenance can save you a great deal of money, energy and time in the long run. We at Acree encourage you to check out our HVAC maintenance checklist in order to get your unit ready for the new season!

1. Did You Change Your Air Filter?

Changing your air filter is one of the easiest and most important steps you can take to ensure your HVAC unit is working properly. A clogged air filter causes issues like a frozen evaporator coil, bad indoor air quality and unnecessary use of energy. On the other hand, a clean air filter prevents these issues and reduces your AC’s consumption by 5 to 15%. So, before you start other HVAC maintenance tasks, make sure you check your air filter—if you notice it’s dirty, it’s time to change it! Ideally, you should be changing your air filter once or twice per month.

2. Did You Seal Up Your Home?

Air leaks can lead to a significant loss in energy and force your AC to run for longer periods of time. To ensure your AC is performing properly during the summer heat, it’s important you check your home for air leaks. The most common spots for air leaks are windows and doors—usually, the sealant and weatherstripping in these areas of your home is worn out, causing air leaks. To cover up these leaks, replace the weatherstripping with newer material from your nearest home improvement store!

3. Did You Clean Your Outdoor Unit?

Your outdoor condenser is an extremely important part of your HVAC system as it contains the condenser and compressor coils. That’s why you need to make sure that there is not vegetation getting near or inside your outdoor unit. To prevent foliage from getting to close to your unit, you will need to trim it and create a 2 ft. clearance around the condenser. If you notice your condenser’s exterior is dirty, remove any debris and dirt that you can and use coil cleaner and water to properly wash the exterior.

4. Did You Clean Your Vents?

Your vents and registers are where conditioned air comes into your home or where unconditioned air goes to your air handling unit. If your vent grilles are covered in dirt, they can most likely worsen your indoor air quality over time. To clean your vents and registers, use the brush attachment on your vacuum to remove any dust. Follow this up with a wipe from a damp cloth, to ensure no dust particles are left behind.

Want to add more to the checklist? Need someone to service, maintain or repair your HVAC unit? Get in touch with the pros at Acree! Call us today at (813) 703-1273 or schedule a service with us online!

Benefits of Air Conditioner Maintenance

benefits of air conditioner maintenance

With summer approaching us quickly, many HVAC contractors have taken to reminding homeowners of AC maintenance. However, not many will go into detail about the specific benefits that homeowners will get from consistently tuning up their air conditioners. That’s where the pros at Acree come in to help you out. Here are some benefits of air conditioner maintenance that homeowners like you should know about!

1. Energy Savings

One of the most significant benefits of air conditioner maintenance is the energy savings that come from it. In fact, you don’t even need to hire a professional to see these savings. Start off by changing your air filter—not only will you notice an improvement in your indoor air quality and your AC’s performance, but your AC will reduce energy consumption by 5 to 15%.

Changing your air filter isn’t the only way you can save up on your energy bill. If you want to reduce your energy costs by up to 10% and heating and cooling costs by 20%, consider sealing up your home properly. That means having insulation professionally installed in your attic, crawlspaces, walls, ceilings and adding weatherstripping to your doors and windows.

2. Increased Comfort

If you ignore professional or even DIY AC maintenance, issues like warm air blowing through AC vents, inconsistent temperatures, increased humidity etc. will be inevitable. By getting maintenance out of the way once or twice every year, you and your family will be guaranteed a great deal of comfort.

3. Less Expensive Repairs

Through consistent maintenance and tune-ups, you will be preventing expensive repairs. Avoiding maintenance can lead to sudden breakdowns and malfunctions that could have easily been prevented if you had inspected and tune-up your unit earlier. It’s better and more cost-effective to maintain your AC beforehand rather than wait till a breakdown and shell out a great deal of money for emergency repairs.

4. Better Air Quality

If you take the steps to ensure your AC is clean, well-maintained and functioning properly, you will ensure better indoor air quality. Unhealthy indoor air quality can lead to allergies and reactions that can be harmful for you and your family. By taking the time to inspect your unit, you will be preventing health issues in the future.

5. Prolongs the Life of Your System

By doing small things like changing your filter, cleaning your outdoor unit and AC coils, you will be prolonging the life of your system and its various components. You won’t need to worry about replacing your unit or its equipment for a while if you simply take the steps to take care of what you already have.

Do you want to know more about why consistent maintenance is better for your system and your energy bills? Get in touch with the pros at Acree! Call us today at (813) 703-1273 or schedule a service with us on our website!

How Often Does an Air Conditioner Need Service?

how often does an ac need service

You might have heard from many HVAC technicians and professionals that it is important to service your air conditioner often. However, there are varying definitions of “often.” To help you out, the pros at Acree are here to tell you exactly how often your AC needs service and professional maintenance.

How Often Should You Service Your AC?

While there are many sources that provide answers to this question, it’s important to listen to the most reliable ones. The Department of Energy says that it is best to have an HVAC technician perform maintenance on your unit AT MINIMUM every year. However, you can choose to have your AC professionally serviced twice a year as well. To make it easier and more affordable many HVAC contractors have special offers and maintenance plans that usually offer 2 tune-ups annually—much like Acree!

What Does a Professional Tune-Up Include?

A professional tune-up allows professionals to inspect your unit for any issues and ensure all components of your unit are working properly. Here are some things you should expect during a professional tune-up service.

  • Look for and seal any duct leaks
  • Inspect filters, coils and ductwork for obstructions such as dirt, dust, mold etc.
  • Check refrigerant amount in your unit, look for refrigerant leaks
  • Ensure your thermostat is working properly
  • Ensure air flow is consistent
  • Inspect and lubricate motors and belts

How Can I Service My AC on My Own?

While it’s important to have your AC looked at professionally, it’s also important to find ways to maintain it on your own. Here are some ways you can perform maintenance on your HVAC unit.

  • Change Your Filter

Changing your air filter is one of the easiest ways you can ensure your AC is in good condition. A clean air filter can improve your indoor air quality and air flow. In addition to that it can reduce your AC’s energy consumption by 5 to 15%! It only takes a few minutes to change your filter, but it can make a world of a difference. Ideally, you should change your filter once or twice every month.

  • Seal Up Your Home

Your AC will be forced to work overtime and run constantly if your home is not sealed up properly. Inspect your home for any air leaks, especially around your windows and doors. If you notice worn out sealing in these areas, be sure to replace it by getting new weatherstripping from your nearest home improvement store.

  • Clean Your Outdoor Unit

Make sure you clean your outdoor unit to ensure your condenser coils are clean and functioning properly. Trim the vegetation around the condenser and maintain a clearance of 2 ft around the unit. In addition to that, clean the external fins of the condenser (without bending them!) using water and coil cleaner. Consult a professional or do your research before you do this.

Have more questions about AC service and maintenance? Contact the pros at Acree by calling us at (813) 703-1273 or schedule a service online!

What is A Nest Thermostat and How Can You Install One?

what is a nest thermostat

If you have been keeping with the latest thermostat news, you might have noticed that many homeowners have started choosing “smart thermostats”. These thermostats allow for greater automation with their Wi-Fi connectivity capabilities and remote temperature control options. One well-known brand is the Nest Thermostat because of its efficient heating and cooling capabilities. If you’re considering adding a Nest thermostat (or any smart thermostat), the pros at Acree are here to help you out! Here is a guide on what a Nest thermostat is, what features it has and how it can be installed.

What Exactly is A Smart Thermostat?

Essentially, smart thermostats allow for higher efficiency and automation when it comes to controlling your home’s temperature. So, instead of physically getting up to change your temperature, you can change it from your smartphone. This remote-control feature is especially helpful when you’re not home and want to control your indoor temperature. Smart thermostats also have many other features such as sensors, maintenance reminders, energy saving reports and temperature scheduling. They make heating and cooling your home easier, more energy-efficient and even a little fun.

What Is A Nest Thermostat?

A Nest Thermostat is one of the several brands of smart thermostats available on the market. It has been regarded as a well-functioning, energy-efficient thermostat by reliable reviewers such as Consumer Reports. Because of its automation and wi-fi connectivity capabilities, Nest Thermostats can be paired with smart speakers such as Google Home and Amazon Echo.

Pros and Cons of The Nest Thermostat

Pros

  • Various Features

One of the great things about the Nest Thermostat is that it has many fascinating features. It is highly adaptable—if you changed the temperature at a certain time a few days in a row, such as when you woke up, next time the Nest Thermostat will change it for you automatically. It programs itself after you use it for only a week. It can also be controlled from anywhere—simply download the Nest app and connect the thermostat to your Wi-fi. If you’re headed home from work and want your home to be cool or warm when you get home, adjust the temperature from your app. Lastly, it can also use sensors or even your phone’s location to start cooling or heating accordingly.

  • Easy to Use

It’s not as complex as you might thing. The user interface of a Nest Thermostat is smooth, sleek and all options are in clear view. Its display can even light up when you walk into the room it is in!

  • It Tells You How Much You Saved

You don’t have to calculate how much energy you save with a Nest Thermostat, because it will tell you. Everyday, this thermostat will show you your energy history and every month it will give you a detailed home report. You can see when you use more energy and the steps you can take to use less!

Cons

  • The Price

If you’re looking for a cheaper smart thermostat, the Nest Thermostat might not be for you. It’s about $50-$100 more than other smart thermostats on the market. However, it can be argued that while the upfront cost is high, it is worth it because of the savings overtime.

  • Issues with Installation

While the Nest Thermostat website says it’s an easy process and takes 30 minutes, a lot of homeowners could have issues with installation, because of the thermostat’s need for a C-Wire. This makes it little bit more different to install a smart thermostat as opposed to other, standard thermostats. Before you make the decision to install or even purchase the Nest Thermostat on your own, be sure to consult an HVAC technician.

  • Does not Come with External Sensors

While Nest Sensors are great, the thermostat itself does not come with them. External sensors need to be purchased separately—they are around $40 each.

Want to know more about what a Nest Thermostat is and how it functions? Contact Acree at (813) 703-1273 or schedule a service online!

What to Expect with a Ductless Mini-Split Installation?

what to expect with a ductless mini-split installation

You have tried everything to properly maintain and control the temperature in each room and save up on heating and cooling. But somehow nothing seems to work. You’re thinking about replacing your HVAC unit, but you don’t know which system would work best for you. This is where the pros at Acree come in; If you’re thinking of changing up your HVAC unit, consider replacing it with a ductless mini-split system. Not sure what that is, how it would work or how it would be installed? Keep reading this helpful guide on what you expect with a ductless mini-split installation.

What is a Ductless Mini-Split System?

If you don’t know what a ductless mini-split system is, you’re in the right place. Essentially, a ductless mini-split system has a single condenser and wall-mounted units only in rooms you want to cool or heat. This allows for you to control the temperature in each room and even save up on costs. If you’re the kind of person who think its wasteful to have a duct system providing cooling or heating to rooms no one is using, a ductless mini split is for you. It also does not require the use of ductwork (hence the name) so if you have spaces where extending ductwork is not possible, you can still provide heating and cooling in these rooms with a ductless system.

How Is it Installed?

Installing a ductless mini-split system is a detailed process, requiring the right tools and proper instructions. Before you install this system, you must decide what kind of ductless mini-split unit you want. A multi-zone system is designed with one condenser and multiple air-handlers whereas a dual zone system has one condenser and two air-handlers.

Once you decide which one you want, you will have to install the indoor wall unit. You will have to make sure the wall leads to a space outdoors as the refrigerant lines will be connected to the outdoor unit. You will also need to create a hole in the wall (preferably 2 to 3 inches) to install your indoor unit. After this you will need to decide the location of the outdoor unit and install it there.

This is by no means a detailed guide, because we believe it is best to consult a professional before you install anything. Like many heavier appliances, mini-split air conditioners and heat pumps are difficult to install. In fact, for those with little experience, they can be dangerous. Manufacturers have different instructions on how you can install these heating and cooling systems so it’s important to pay attention to details and guidelines. If you’re not sure how you can install this on your own, be sure to contact a local HVAC technician you trust so you can get the assistance you need.

Want to install a ductless mini-split system? Contact the pros at Acree for assistance! Call us today at (813) 703-1273 or schedule a service with us on our website!

What to Know About Aeroseal Duct Sealing?

what to know about aeroseal duct sealing

If you have any leaks in your ductwork, it’s important you get them sealed and repaired quickly. The indoor air you inhale is constantly making its way through your ducts and if they have any leaks, filtered air can easily get sucked out. Instead, outdoor, unconditioned air can make its way in, forcing your HVAC unit to work overtime. This can not only decrease the efficiency of your unit but even lead to energy loss and high energy costs. To counter this problem, duct sealing is the best solution. To be more specific, Aeroseal duct sealing is the best solution. Not sure what that is? No problem! The pros at Acree are here to tell you exactly what you need to know about Aeroseal duct sealing.

1. What Exactly is Aeroseal?

Aeroseal is the name of new duct sealing technology that ensures your ducts are as airtight as possible. It is meant to improve the efficiency of your HVAC unit and is made up of polymers that essentially properly seal up any gaps, cracks or leaks in your ductwork.

2. What Does the Aeroseal Duct Sealing Process Look Like?

If you choose to have your duct sealed through Aeroseal, the contractor will start off by closing or blocking any of the open vents, registers and grilles in your home. Then the Aeroseal device is attached to your ductwork near the furnace, which is sealed away as well. This is meant to protect any important HVAC components and equipment. After that, the Aeroseal machine will essentially blow an “atomized polymer” in the ductwork. The machine uses synthetic particles which are created and joined together to block any air from escaping. These particles will latch on to any opening from which pressurized air is escaping and start building a seal.

3. Will Aeroseal Duct Sealing Be Effective?

Aeroseal duct sealing has several benefits and is a completely safe, effective and efficient method to seal your ducts. However, it might be best suited for smaller leaks. So, if you have tried sealing up your home in various ways and still find your energy costs increasing, you might have small leaks in your ductwork. Aeroseal duct sealing will be effective in tackling these leaks. That is primarily because the method of increasing the indoor air pressure at the beginning of the process will make it easier to pinpoint any tiny gaps.

4. What Are The Benefits of Aeroseal?

There are various benefits of Aeroseal Duct Sealing technology such as:

  • Lower Energy Costs

Since Aeroseal is great at pinpointing smaller leaks it is an effective method of lowering energy loss by repairing even the tiniest leaks.

  • Increased Comfort

Duct sealing can greatly improve indoor air quality leading to increased comfort and better health!

  • Consistent Temperature

Duct leaks lead to some rooms feeling too hot and others feeling too cold. Aeroseal duct sealing can repair these leaks efficiently, leading to a more consistent temperature throughout your home.

Have More Questions About Aeroseal? Contact the Pros at Acree! Call us today at (813) 703-1273 or schedule a service online!